Sourdough Bread Bowls from Boudin Bakery
Sourdough is my favorite type of bread. It has a tangy flavor, crunchy exterior, and pillowy interior that makes it the tri-force of carboyhydrates. At Disney California Adventure visit the Pacific Warf Cafe where sourdough loaves and bread bowls are served daily. Most guests will rave about them and include them on their "must have" foodie list filled with clam, corn, or potato chowder; chili or broccoli and cheddar soup. Take a stop and check the window of the Boudin Bakery to watch the sourdough being made!
If you aren't familiar with the process of making sourdough, it gets its characteristic flavor from a starter. The starter is composed of flour and water feeding and growing at room temperature to develop bacteria and yeast. It is a bubbly mixture of gasses, sour compounds, and the natural leaving of yeast! I always assumed that you had to get your sourdough starter from a "mother" starter. Something ancient and cultivated without fail by someone who definitely knew what they were doing. Turns out that isn't the case. You can make sourdough starter in your kitchen and be baking tri-force bread in a matter of days to weeks... It's basically baking science happening on your kitchen counter!

Before I jump into the process of achieving the perfect sourdough bread bowl and knock your socks off broccoli and cheddar soup at home full disclosure: I got the starter from my friend, Sarah. She had been cultivating the start for about 20 days by the time I received it. My first attempt had gone a bit sideways and had baked up edible but with no rising power. So to that end I will tell you this process requires time, dedication, and a good supply of flour. Making bread with a starter has a lot of variation in methods and instructions especially online. I'll outline what I tried, feel free to leave questions or comments!
First things first: starter. Basically mixing equal parts flour and water, allowing to rest for 24 hours at room temperature, then discarding half before feeding again the next day. Overtime, sufficient gasses develop in the starter so it floats when a bit is dropped into a glass of water indicating it is time to bake. Some recipes say this can happen in as little to 2-5 days. In my limited experience this is enough time to develop the flavor compounds for sourdough bread but not the leaving power. Most of those recipes recommend adding additional yeast to the starter or dough once ready to bake. The starter I am currently cultivating is based on King Arthur's Sourdough starter.
The recipe below for sourdough bread bowls was modified from The Cultured Palette. First I mixed the starter, water, and flour in my largest glass mixing bowl. This initial mixture sat, uncovered, at room temperature for 30 minutes. Next I mixed in the salt using my favorite silicone and wood spatula to stretch and fold the edges of the dough onto itself, turning the bowl 1/4 of the way after each fold about 20-30 folds in total; this initial stretch and fold shapes the dough from shaggy to smooth. I repeated this method three more times about every 30 minutes using the spatula to pull up the side of the dough, fold it into the center, then turn the bowl 8-10 times.

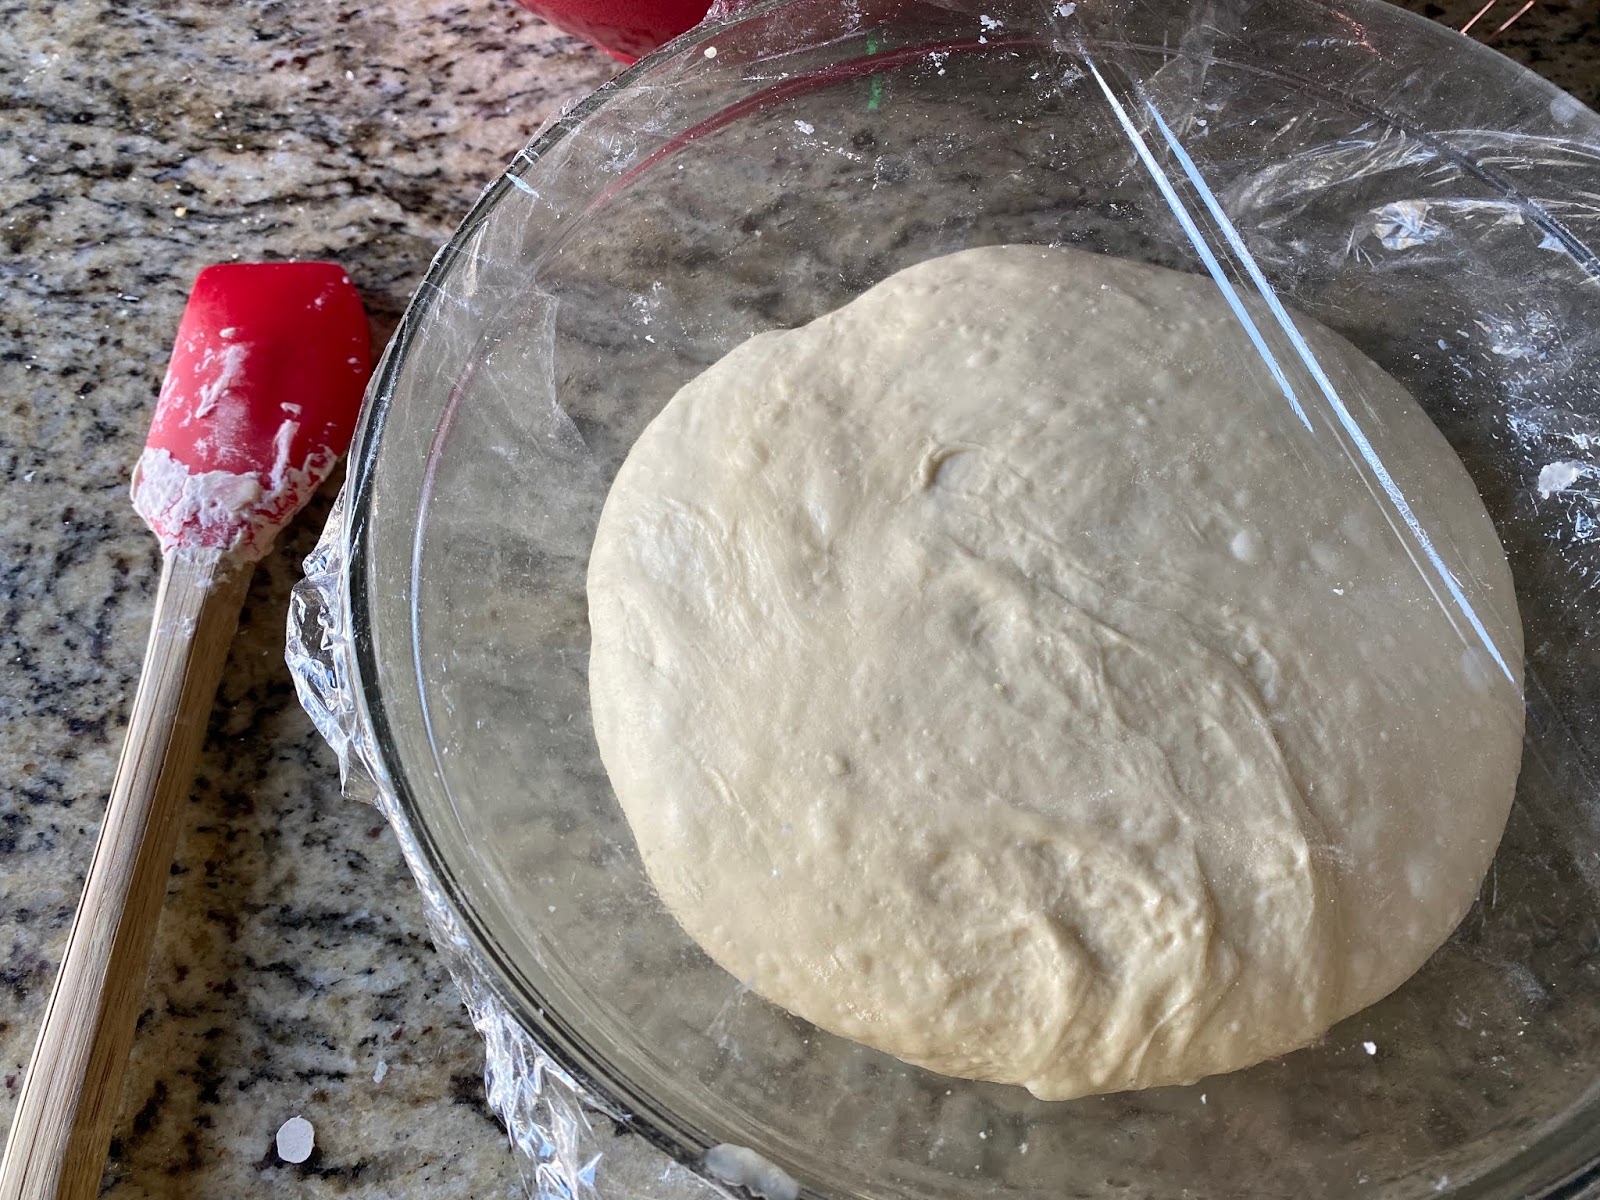
Next is repeated the stretch and fold method on a lightly floured surface. This time I used my hands to pinch the edge of the dough and pull it back into the center, being careful not to tear it, turning 1/4 each time about 8 folds total. Turn over on surface and smooth into a ball with the seam side down. Then back in a lightly oiled bowl, covered, to rest for 30 minutes. Repeat the stretch and fold on the lightly floured surface and return to the bowl. Rest for 2 hours. Below you can see what happened to the dough about every 30 minutes... I expanded by about 1.5-2x it's original size. A sign of a happy, healthy starter!


To develop additional flavor, I refrigerated the dough covered with plastic wrap, for about 14 hours (average recommendation is 12-16 hours). I was surprised to see that it had continued to expand a little more overnight. You can see the surface has lots of bubbles!

Next up was dividing the dough into four equal pieces on a lightly floured surface, shaping into a round by pulling the sides down and tucking them underneath each ball, then resting on the counter. Each piece weighed about 340 grams. A kitchen scale was really helpful for this recipe - baking by weight (g) versus volume (cups) ensures the ingredients are correctly measured with less error. Also the balls are more equal in size for more even baking. After resting for 1 hour, I used the stretch and fold method to tighten each each round into a boule. I cut pieces of parchment paper to the size of cereal bowls and dusted with a little cornmeal to ensure nothing would stick to the paper. Each boule rested in the parchment lined bowl to proof for 45 minutes. The bowl assisted the dough to keep its shape during the final rise and the parchment makes transferring to a dutch oven for baking a snap.


Once the boules were puffy and bubbles were clearly visible again, I slashed the surfaces with a paring knife and applied a light egg white wash. The boules were baked in a preheated dutch oven at 425 degrees F for 28 minutes covered and 4-5 minutes uncovered. For perfect browning and crust creation, bake 1-2 at a time. I baked three together initially and each has one side which isn't a crunchy crust due to being in close proximity to the other boules. These can also be baked on a preheated pizza stone or baking sheet but I'm not sure yet how that impacts the crust which requires the steam created inside the dutch oven.


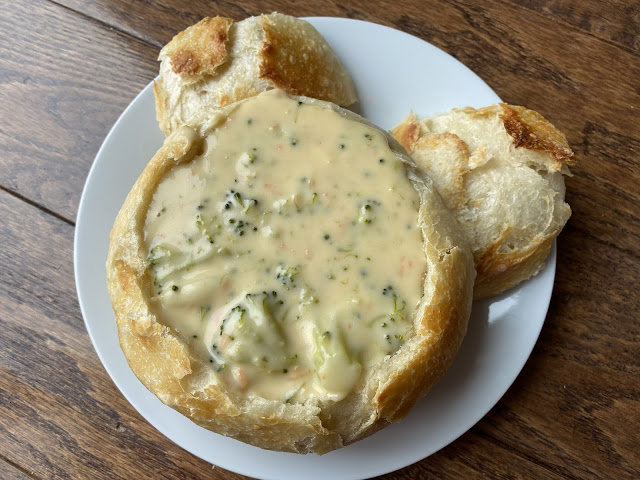
To use for bread, using a paring knife and cut into each loaf at an angle all the way around half and inch to one inch above the midline. Pull out most of the bread form the sides and bottom leaving enough to maintain a barrier for the soup. You can see the airy, soft texture of the bread after the top is removed. Each bowl held 2-2.5 ladles of soup! Check out the posts for Broccoli and Cheddar Soup.


If you aren't familiar with the process of making sourdough, it gets its characteristic flavor from a starter. The starter is composed of flour and water feeding and growing at room temperature to develop bacteria and yeast. It is a bubbly mixture of gasses, sour compounds, and the natural leaving of yeast! I always assumed that you had to get your sourdough starter from a "mother" starter. Something ancient and cultivated without fail by someone who definitely knew what they were doing. Turns out that isn't the case. You can make sourdough starter in your kitchen and be baking tri-force bread in a matter of days to weeks... It's basically baking science happening on your kitchen counter!

Before I jump into the process of achieving the perfect sourdough bread bowl and knock your socks off broccoli and cheddar soup at home full disclosure: I got the starter from my friend, Sarah. She had been cultivating the start for about 20 days by the time I received it. My first attempt had gone a bit sideways and had baked up edible but with no rising power. So to that end I will tell you this process requires time, dedication, and a good supply of flour. Making bread with a starter has a lot of variation in methods and instructions especially online. I'll outline what I tried, feel free to leave questions or comments!
First things first: starter. Basically mixing equal parts flour and water, allowing to rest for 24 hours at room temperature, then discarding half before feeding again the next day. Overtime, sufficient gasses develop in the starter so it floats when a bit is dropped into a glass of water indicating it is time to bake. Some recipes say this can happen in as little to 2-5 days. In my limited experience this is enough time to develop the flavor compounds for sourdough bread but not the leaving power. Most of those recipes recommend adding additional yeast to the starter or dough once ready to bake. The starter I am currently cultivating is based on King Arthur's Sourdough starter.
The recipe below for sourdough bread bowls was modified from The Cultured Palette. First I mixed the starter, water, and flour in my largest glass mixing bowl. This initial mixture sat, uncovered, at room temperature for 30 minutes. Next I mixed in the salt using my favorite silicone and wood spatula to stretch and fold the edges of the dough onto itself, turning the bowl 1/4 of the way after each fold about 20-30 folds in total; this initial stretch and fold shapes the dough from shaggy to smooth. I repeated this method three more times about every 30 minutes using the spatula to pull up the side of the dough, fold it into the center, then turn the bowl 8-10 times.

Next is repeated the stretch and fold method on a lightly floured surface. This time I used my hands to pinch the edge of the dough and pull it back into the center, being careful not to tear it, turning 1/4 each time about 8 folds total. Turn over on surface and smooth into a ball with the seam side down. Then back in a lightly oiled bowl, covered, to rest for 30 minutes. Repeat the stretch and fold on the lightly floured surface and return to the bowl. Rest for 2 hours. Below you can see what happened to the dough about every 30 minutes... I expanded by about 1.5-2x it's original size. A sign of a happy, healthy starter!


To develop additional flavor, I refrigerated the dough covered with plastic wrap, for about 14 hours (average recommendation is 12-16 hours). I was surprised to see that it had continued to expand a little more overnight. You can see the surface has lots of bubbles!

Next up was dividing the dough into four equal pieces on a lightly floured surface, shaping into a round by pulling the sides down and tucking them underneath each ball, then resting on the counter. Each piece weighed about 340 grams. A kitchen scale was really helpful for this recipe - baking by weight (g) versus volume (cups) ensures the ingredients are correctly measured with less error. Also the balls are more equal in size for more even baking. After resting for 1 hour, I used the stretch and fold method to tighten each each round into a boule. I cut pieces of parchment paper to the size of cereal bowls and dusted with a little cornmeal to ensure nothing would stick to the paper. Each boule rested in the parchment lined bowl to proof for 45 minutes. The bowl assisted the dough to keep its shape during the final rise and the parchment makes transferring to a dutch oven for baking a snap.


Once the boules were puffy and bubbles were clearly visible again, I slashed the surfaces with a paring knife and applied a light egg white wash. The boules were baked in a preheated dutch oven at 425 degrees F for 28 minutes covered and 4-5 minutes uncovered. For perfect browning and crust creation, bake 1-2 at a time. I baked three together initially and each has one side which isn't a crunchy crust due to being in close proximity to the other boules. These can also be baked on a preheated pizza stone or baking sheet but I'm not sure yet how that impacts the crust which requires the steam created inside the dutch oven.


To use for bread, using a paring knife and cut into each loaf at an angle all the way around half and inch to one inch above the midline. Pull out most of the bread form the sides and bottom leaving enough to maintain a barrier for the soup. You can see the airy, soft texture of the bread after the top is removed. Each bowl held 2-2.5 ladles of soup! Check out the posts for Broccoli and Cheddar Soup.


Sourdough Bread Bowls
Yield 4
Ingredients
- 225 g sourdough starter
- 637 g all-purpose flour
- 412 g water
- 15 g salt
Instructions
- Mix the starter, flour and water together. Rest uncovered for 30 minutes.
- Add the salt to the dough and mix thoroughly using the stretch and fold technique right in the bowl. Rest uncovered for 30 minutes.
- Repeat the stretch and fold in the bowl on the ball of dough for 10 folds. Rest 30 min.
- Repeat the stretch and fold in the bowl again for 10 folds. Rest for 30 minutes.
- Repeat the stretch and fold in the bowl final time for 10 folds. Rest for 30 minutes.
- Turn dough out onto a lightly floured counter and stretch and fold technique for 10 folds. Form the dough into a ball and place in a lightly oiled bowl. Cover the bowl with plastic wrap. Rest for 30 minutes.
- Repeat the stretch and fold on the floured counter. Reform the dough into a ball and replace it in the bowl. Allow to rise on countertop covered with plastic wrap for about 2 hours or increased in size by 1.5-2x.
- Place the dough in the refrigerator covered for 12-16 hours.
- Turn the dough out onto a lightly floured surface. Divide into four equal parts and loosely shape into rounds. Rest on counter top for 60 minutes.
- Shape into round balls (or boules) and proof in bowls lined with parchment paper and a dusting of corn meal for 45 minutes.
- Preheat the oven to 425 degrees F. Preheat 5-6 quart dutch oven for 25 minutes.
- Score the boules, brush with egg white wash or water, and place in preheated oven with parchment paper underneath. Cover with lid. Bake for 28 minutes. Uncover and continue baking for 4-5 minutes.
- To make bread bowls, cut around the edge of the boules and into the bread. Use your fingers to tear the middle out forming a bowl. Serve the middle on the side for dipping. Enjoy!

Comments
Post a Comment